
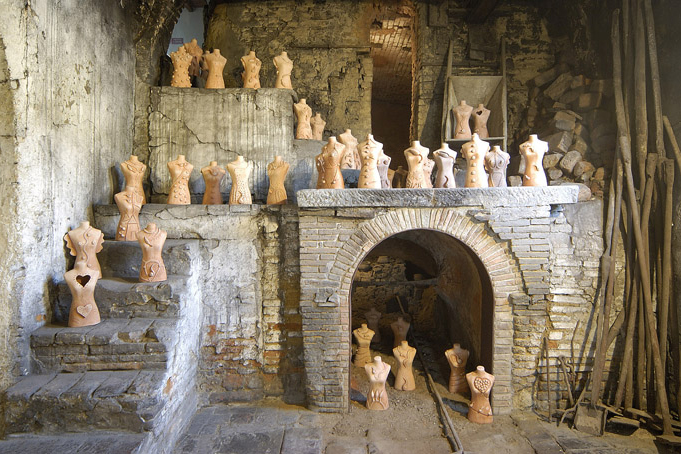
How ceramics are made

The process
Over the course of history, men have developed many different techniques to shape clay into the desired form.
Coil construction. This technique consists in preparing sticks or strips of clay that are placed fresh, one on top of the other, to form a container. The strips are then well blended together with fingers, and the exterior is carefully smoothed.
Mold construction. Such technique requires preparing a two-part mold with an inverse and opposite shape to the one of the final product. Fresh clay is pressed onto the mold to fill all the empty spaces. The two parts can then be easily separated after the clay has dried, due to the significant volume reduction of the clay, caused by the evaporation of the water in the material.
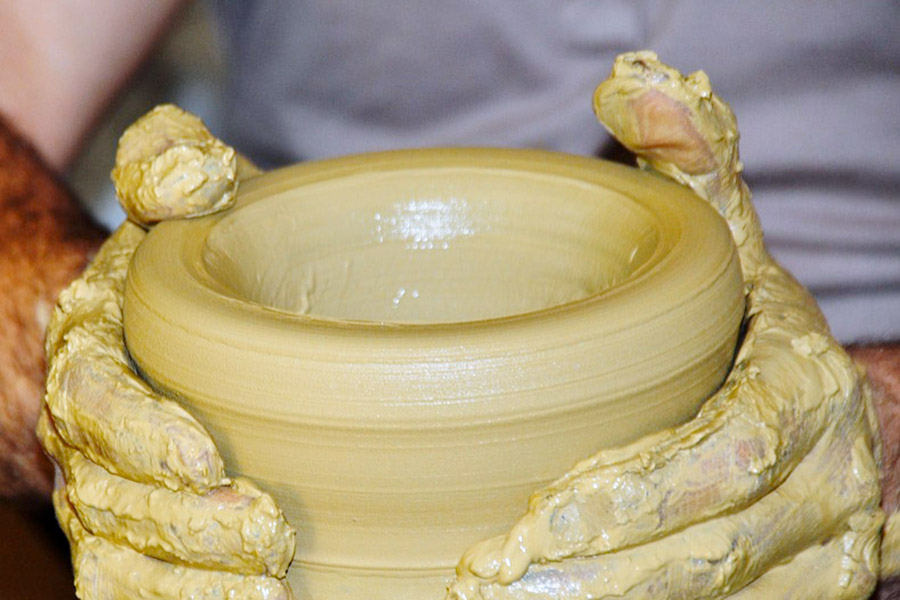
Wheel throwing. Around the end of the 4th millennium BC, humans invented the potter’s wheel, which saves a lot of time in the manifacture of clay pots. The wheel not only offers significant precision, but it also allows for the mass production of objects of the same size on a circular base.
The ancient wheel
Before the discovery of electricity, ancient kilns used human power to move the wheels.
Around the Middle Ages, the potter’s wheel took on the appearance it kept until a few years ago; this type of wheel is still widely used in countries where modern technology is less prevalent.
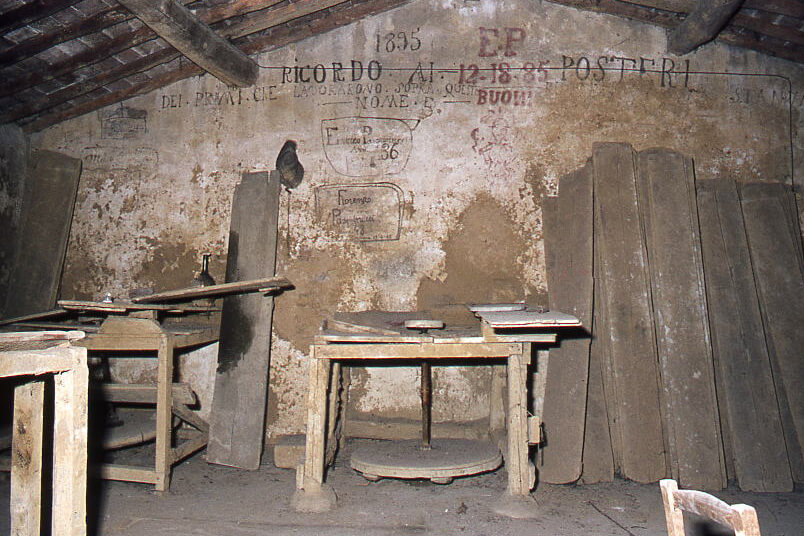
The ancient wheel is a very simple machine, consisting of two wheels of different sizes, one much larger and heavier than the other, connected by a shaft.
The larger wheel is placed at the bottom, so that, by pushing it with the foot, the smaller wheel also rotates in an identical way.
The inertia of the lower wheel’s movement, caused by its greater weight, allows the potter to work the clay without needing to continuously push the machine and avoiding the risk that the rotation might abruptly stop.
Such simple mechanism was integrated into a bench, where the operator, called a turner, could sit.
The coatings
The coatings used in medieval and post-medieval (Renaissance, modern) European ceramics were essentially of three types:
1) Ceramics with a transparent or semi-transparent coating, also known as glazed ceramics, achieved with simple lead oxide or with added colorants.
4) Ceramics with an opaque earth-based coating, known as engobed ceramics, protected by a layer of glossy glaze.
5) Ceramics with a coating, known as majolica, based on silica, tin oxide, and lead, with a glossy white background.
Once the clay or pottery works have been shaped, they must be fired after being gradually dried.
Unless the quality is good enough to allow reaching very high temperatures, clay firing results in a porous product (the biscuit), which absorbs liquids but can be made waterproof by applying one of these types of coatings.
The substances used to achieve said coating (glaze, enamel) are usually absorbed by the ceramic through immersion.
In the case of engobes, it involves using particularly purified types of clay that are found in nature, while it is essential to manufacture a compound called marzacotto in order to achieve any silica and metal oxide-based coating.

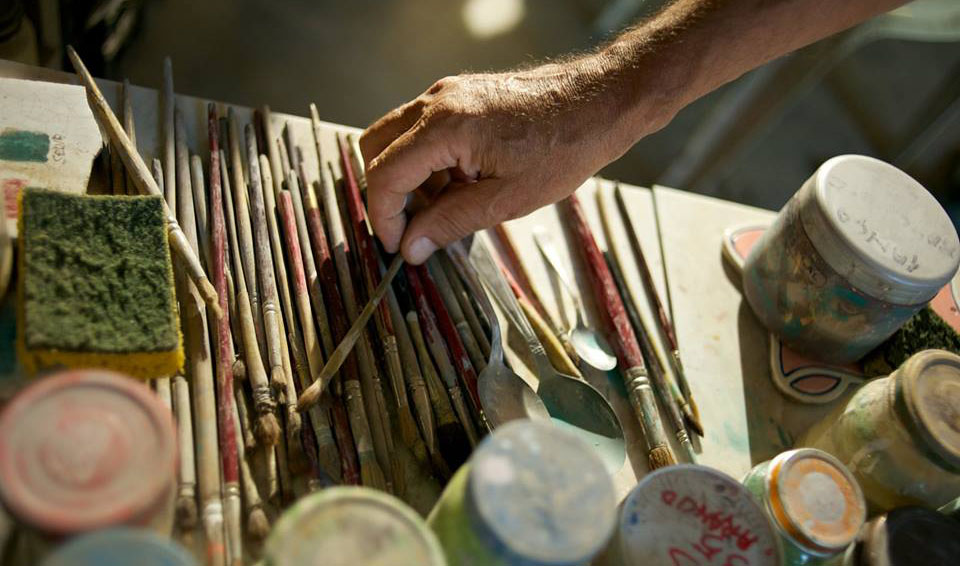
Color preparation
In order to color ceramics that were already covered with a metallic coating, colors also made of metal oxides were used.
The process remains essentially the same to this day.
Colors can be divided into two categories: simple formulas, formed by the oxide of a single metal, and compounds, produced by mixing different metals and other substances.
Oftentimes the ceramic painter can’t see the final hue that the color will take on before the second firing.
Colors, in fact, achieve their brilliance only after being fused again in the kiln.
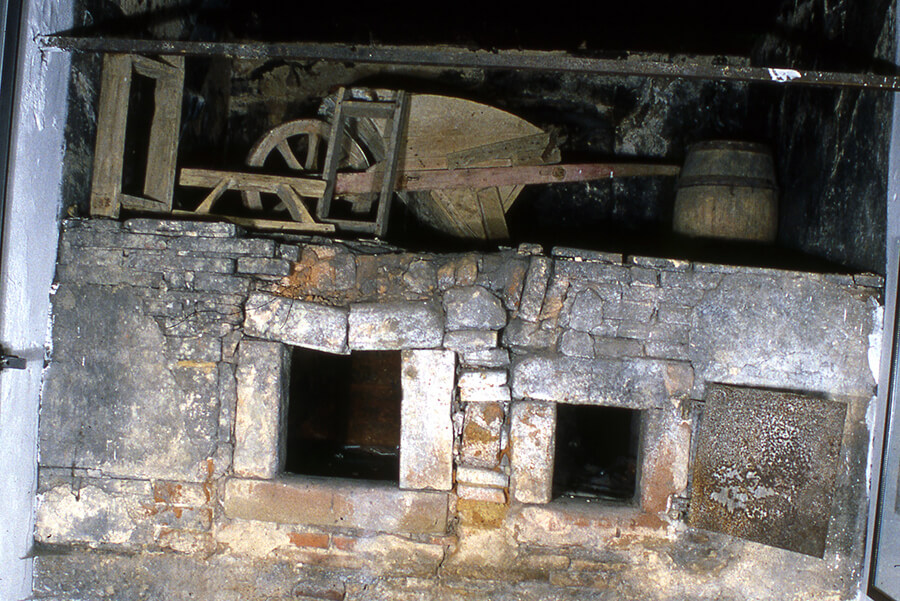
The reverberatory furnace
In order to complete all the operational phases required to prepare silica-metallic coatings (glazes and enamels) and colors, metals were calcined (artificial oxidation) using a special oven, called a furnace or small kiln.
It was a two-chamber oven, separated by a dividing wall that did not reach the vault.
In the smaller side of the kiln, a fire was lit through a small opening.
The other chamber of the oven would vent the flames all the way through the chimney, without contaminating it with combustion residues.
For this peculiarity, it was also called a reverberatory furnace (i.e., with indirect flame).
During the phase of metal fusion in the kiln, an operator, maneuvering a heavy hoe-shaped tool (zappone), fixed with a chain at its center of gravity, agitated the surface of the molten metal, facilitating the combinations (agreement) between different metals and their oxidations.
In the reverberatory furnace, all the metal oxides necessary for ceramic processing were manufactured, and marzocco was added to them; these compounds were then finely ground using hydraulic mills, moved wither manually (grinders) or by animals.
Glazing-Enameling-Decoration
In the past, whenever potters wanted to fix a metal oxide-based coating film on a piece of ceramic that was only fired once, they would usually immerse the biscuit in a tub filled with liquid glaze or enamel, a finely ground compound that was diluted with water. This technique is still used today.
The immersion (dipping) is carried out by workers called dippers, who must make sure not to touch the ceramic piece with their hands before immersing it, as the natural oils of the skin would prevent the metallic substances from adhering well to the biscuit.
Due to its porosity, the biscuit quickly absorbs the liquid part of the compound, leaving the metallic parts on the surface.
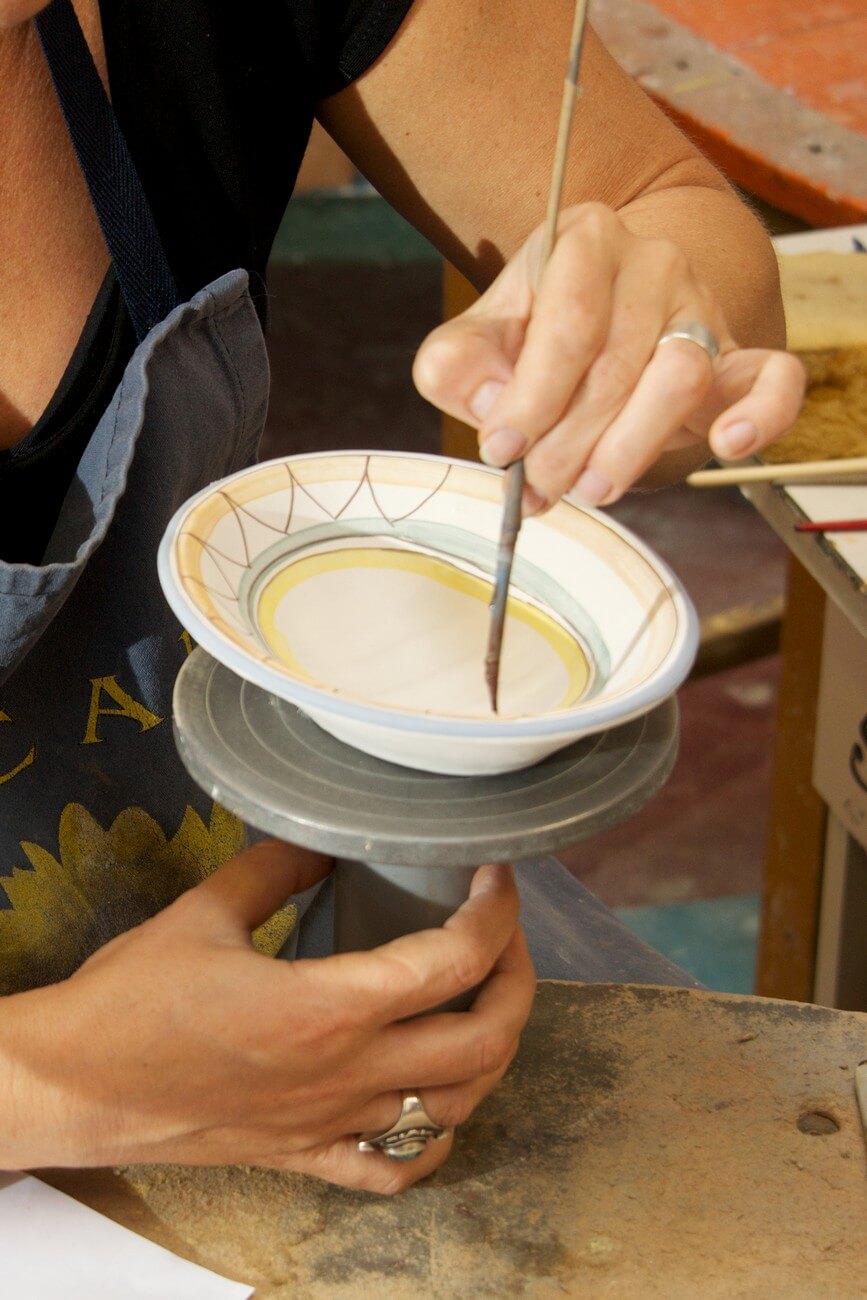
Majolica pieces require a specific treatment: after they’ve been dipped in enamel and left to dry, their ceramic surface can be decorated by painting it or scratching the colored parts.
FIRING AND DECORATION
The techniques of the final stages of ceramic processing
The kiln
The simpler ceramic kiln consisted of a lower part (also called an ash pit), intended to house the fuel, and an upper firing chamber, through which the fire, emerging from the ash pit, had to pass, filtered by numerous holes that were opened in the floor.
The more advanced kiln features the addition of a third chamber, also called a small kiln, placed above the main firing chamber.
Since it was near the chimney that was dedicated to flame exhaustion, combustion residues (smoke and soot) accumulated there: therefore, this was the firing chamber intended to produce the biscuit, which could not be damaged by such residues, as it lacked melting coatings.
Another type of kiln was the muffle kiln, in which the flames passed through an external gap without touching the objects meant to be fired.
The muffle kiln could also become a reducing atmosphere kiln when oxygen was removed from the firing chamber.
This operation was usually carried out by introducing substances that, when heated, produced abundant smoke.
After being fired for a third time (third firing) at a moderate temperature (about 650°C), the colors used in decoration would become iridescent and take on metallic reflections.
Stacking
The firing phase was a particularly delicate process that required the contribution of extremely experienced people called kiln workers. To make the most of the available fuel, they would try to fill the kiln with as many objects as possible, arranging them one on top of the other in orderly stacks (stacking).
Kiln workers would usually distance products that were glazed or vitrified with silica-metallic coatings from one another, using special supports that often took the form of a tripod. This technique was meant to prevent the fusion of the coating from welding them together during firing, and it is still used today.
In traditional kilns (not the muffle ones), objects were placed in special containers, called boxes or cases, before firing, in order to prevent flames and other combustion residues (smoke, soot, dust) from damaging the glaze film. Inside these boxes, the items were distanced from one another with triangular supports, which were inserted into the walls and protruded towards the inside of the cases themselves.
Once full, the kiln was sealed by closing the access door (usciale) to the firing chamber with a temporary wall: the fire was thus forced to exhaust towards the outside, by passing through it completely.
Firing
The first phase of the kiln lighting involved the use of small-sized wood (stipa) that burned easily and evenly, quickly bringing the firing chamber to the desired temperature.
In order to preserve the color of the ceramics, they would often keep feeding the fire with large wood.
Ceramic firing lasted at least 11-12 hours, during which the kiln worker made sure to keep the optimal temperature (about 900°C for majolica pots firing), by adding or removing wood with special forks.
Since there used to be no specific tools to control the temperature at the time, the kiln worker needed to rely on their experience, determining the approximate degree of temperature from the color of the inside of the kiln, which would go from red to white depending on the heat.
At regular intervals, the kiln worker would use a special iron tool (lookout) to extract a small pot (test, procella), placed in the kiln in a position that was easily accessible from the outside, in order to verify the progressive degree of firing of the objects.
When the pieces were ready, the kiln was turned off, so that it could gradually cool over the course of at least a day.
After that, the temporary closure of the opening of the furnace (the “usciale”) was demolished, and the finished product was extracted.

Decoration
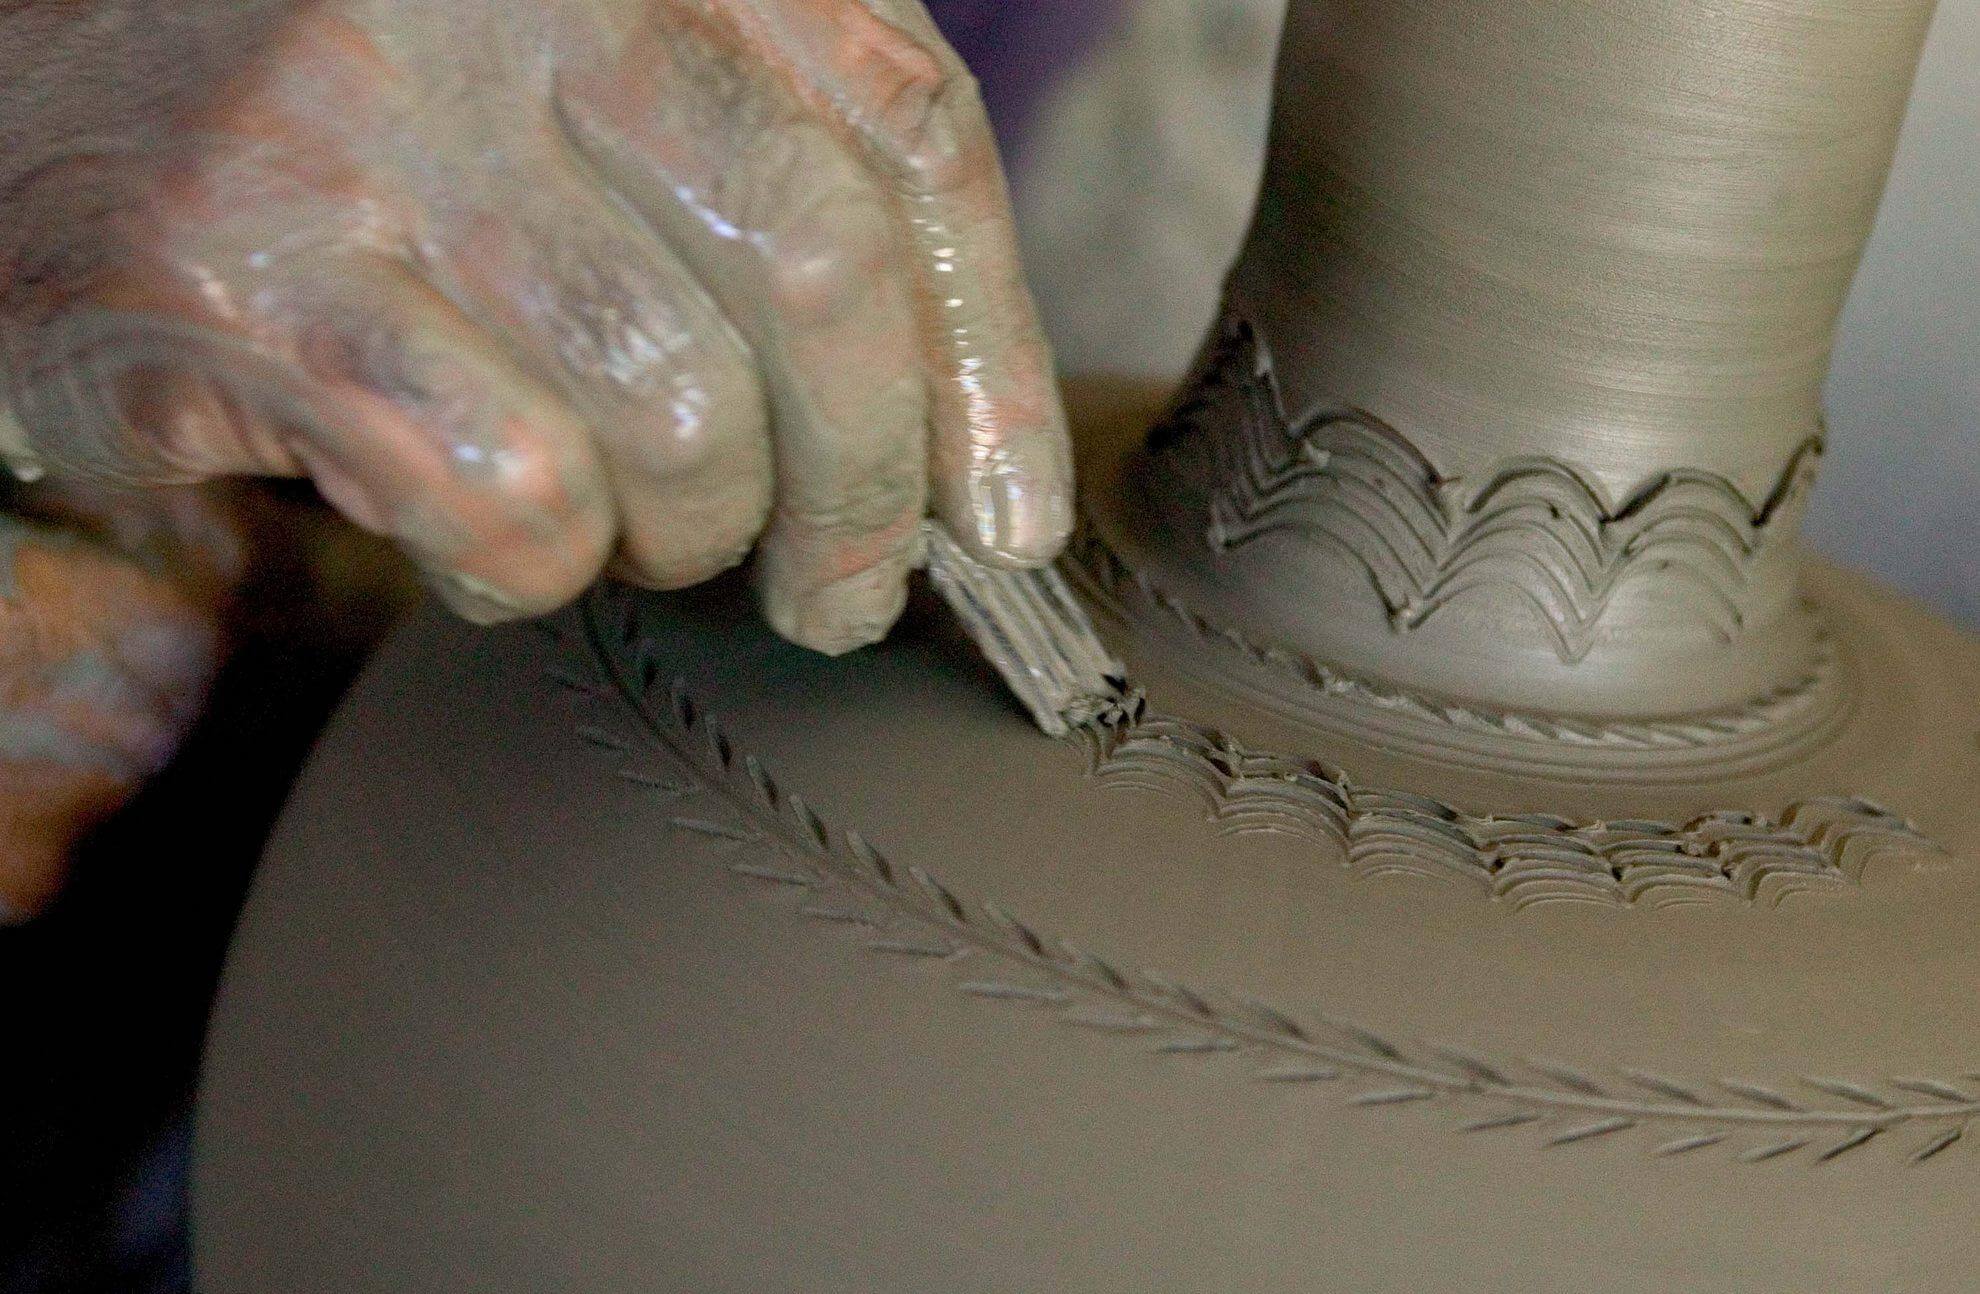
We can identify three fundamental methods of ceramic decoration that were used in the past: painting, scratching (or “graffito”), and the addition of clay substances in relief.
While painting involves applying one or more colors with a brush over the surface, the “graffito” method requires removing the coating (engobe or enamel) when it is still fresh, using a pointed tool or a prong (stick).
The superficial layer with engobes is removed to reveal the reddish color of the underlying biscuit: with this system (called “graffito a punta”), only the outlines of the figures are drawn, which can then be perfected by painting them.
It is called “graffito a fondo ribassato” (with a lowered background) when the outlines are engraved by removing more extensive parts of the engobes with a wide-pointed tool or prong.
The method of adding material in relief, usually the same clay as the biscuit, was widely used in Northern Europe (Northern Germany and England) in ceramics known as slipware.
For painted decoration, specifics artifices have also been adopted to make the color emerge on the surface of the decorated object.
In Spain, the lines that separated the decorations used to be outlined with a small cord, which was soaked in fatty substances that would would prevent the colored glazes from adhering during firing. Burning the cord would leave those areas, where the color was not meant to be, uncovered, due to said fatty substances. This process, called “cuerda seca”, would preserve the clearly-definied margins of the decorations.